[Editor’s Note: This article originally appeared in the June 2016 issue of Grassroots Motorsports.]
2017 as a whole was a rough year for our turbocharged Miata. We blew the engine at Daytona and replaced it with a professional rebuild before stumbling through two test days that both ended in disaster. Then we capped off the season by destroying our freshly installed engine at Sebring.
Why did we keep failing? It’s a long story, but there was one overarching theme: We didn’t take things seriously. We’d been lucky in our past endurance racing efforts, and that luck had affixed rose-colored glasses to our faces. We assumed everything would work out okay with our Miata, even when we didn’t have any evidence to back up that belief.
We were tired of failing. So after we dragged home our blown-up Miata from Sebring, we decided to take a break, regroup, and reevaluate our approach. Over the next six months we learned some lessons, changed some practices, and ordered some parts. The result? We finished a race, had fun, and placed mid-pack. Are we Chip Ganassi Racing? No, not yet. But at least we can now say that we raced without embarrassing ourselves.
Here are the lessons we learned along the way, and how they improved our race effort.
Lesson 1: Never Assume Anything
Photography Credit: Tom Suddard
This lesson was penned on the drive home from that fateful Sebring race, our engine still dripping oil from what we assumed was a busted head gasket. We’re good-natured people, and we tend to trust the experts around us. After all, everybody is just doing the best they know how and they usually do a good job, so you can trust their work, right?
Nope! Not if you’re a racer, that is.
Racing requires that you verify every single little thing. Looking back, there’s quite a list of items that we shouldn’t have assumed were okay: our rebuilt turbo, our differential, our temperature gauge, our radiator and our roll cage.
All were made by experts–yes, we used to call ourselves experts–and we took them at their word. Now, though, we’ve learned to double-check. Our motto used to be “make friends and have fun.” Now it’s “trust, but verify.” Is there oil in the differential? It doesn’t matter that a teammate said there was: Pull the plug and check yourself.
In fact, we put this lesson into action as soon as we got back from Sebring. We were pretty sure that our engine needed a new head gasket, since oil was dripping from the junction of the head and the block and the engine had overheated.
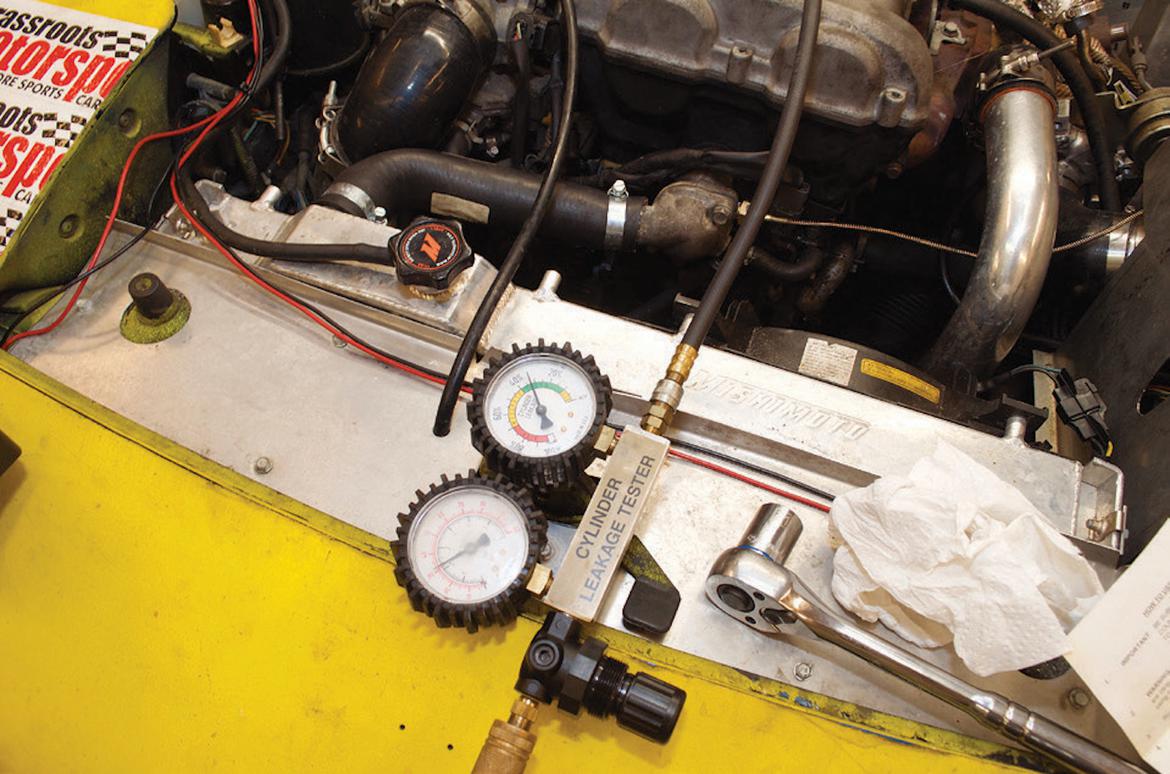
But rather than assume the accuracy of that diagnosis and simply replace the gasket, we performed compression and leak-down tests. The leak-down test revealed that two cylinders were leaking out nearly 30 percent of their compression.
Where was it going? The oil cap was pressurized, but the cooling system, intake and exhaust were all just fine. Final diagnosis: Our piston rings were junk.
Of course, we still had our oil leak to diagnose. That was definitely a head gasket, right? Probably, but remember: Never assume anything. The oil could have sprayed from the turbo or spilled during a top-off.
More detective work was required. UV dye in the oil and a UV flashlight confirmed that fresh oil was, indeed, seeping out between the head and block. So the head gasket was bad, but it wasn’t our only issue.
Photography Credit: Tom Suddard

Photography Credit: Tom Suddard
Lesson 2: Pick a Parent

Photography Credit: Wayne Presley
Every child needs an authority figure, and we feel that the same is true for cars. Our Miata spent 2017 bouncing between three different shops located more than 500 miles apart, so we let each shop’s owner call the shots while the car was in their possession.
In hindsight, that just didn’t work. Letting a car jump between workspaces is not the end of the world–that’s the reality of racing in your free time–but a single person needs to manage its to-do list and act as the team leader.
Just playing fast and loose was causing us to lose parts, buy things twice, and miss easy tasks like changing the brake pads before a race. Plus, we never seemed able to make a firm decision when one needed to be made.
Simply put, there were too many cooks in the kitchen. They were well-intentioned cooks, yes, but still too numerous.
We put this lesson into action as soon as we figured out that our overheated engine needed piston rings and a head gasket. We named Wayne Presley (above), our most experienced team member and the owner of Very Cool Parts, as our crew chief, giving him the authority to call the shots on our Miata. His decision: We were going to install a used Miata engine from our spares stash. That brings us to the next lesson.
Lesson 3: Spare Parts Are Important

Photography Credit: Tom Suddard
We’ve had more than a few missteps with this Miata, and we didn’t handle them like a real race team. For example, isn’t it wild how teams spend millions of dollars to make it to the Rolex 24 At Daytona, then break a differential a few laps in, put the car on the trailer, and go home? Yeah, that doesn’t happen because they bring spares. We’d overlooked our spares pile for years, substituting active management with vague hopes that what we needed would be present, working and easy enough to find under pressure.
Our string of failures brought home the need to change that approach. Now that we have a few years of racing this car under our belts, we have an organized spares selection based on what’s broken in the past.
We’ve also upgraded our organization: Instead of an assortment of boxes and bins, which required lots of time-consuming digging whenever we needed something, we picked up an inexpensive rolling cabinet from Harbor Freight. It gives us a permanent, organized place to store everything, as well as a handy workbench at the track.
Now we don’t have to dig through literal piles of spares. We can open the cabinet, read the labels, and grab what we need. We even tape a spreadsheet right on the door listing every part in the cabinet (and its approximate location).
Why all of this work? Because if our cam-angle sensor fails, we need to be able to find it quickly. More important, we need to know if we even have one in the first place. If we don’t, we can immediately start walking the paddock to find it. We keep this spreadsheet digitally, too, so we can search our spares inventory right from the pit stall.
Lesson 4: Maintenance Matters

Photography Credit: Tom Suddard
This is a corollary to that “Never Assume Anything” lesson, and it’s important. We used to consistently slack on our car’s maintenance. We don’t mean we went on track with old brake pads, dirty oil and worn tires; we’re talking about the less obvious stuff, like checking tie-rod ends and oil lines.
Skipping routine post-race checks directly cost us two engines, and that strategy is now a thing of the past. No matter what the car does on track, we put it up on jack stands or the lift afterward to inspect each component that can wear or fail after miles of hard use.
This is commonly called “nut-and-bolting” a car, meaning that you check every single nut and bolt. This process caught a few mistakes after we installed our new engine-not surprising, since a big project like that is bound to leave some loose ends.
Lesson 5: NASA Uses Checklists for a Reason

That last lesson sounds great, but how do you remember every single wear point on your car? Easy: Use checklists.
Sure, we always intended to use checklists, but did we really use them for every single function on our team? No. We did, however, excel at making a list, using it for one race, and then neglecting to print a new copy for the next event. We just assumed that everybody knew what he or she needed to do at that point.
Notice that we said “assumed” again? Remember Lesson 1!
Now we have four separate checklists that accompany the car: Spares, Post-Race, Race Day and Trailer Loading. Is that overkill? Yeah, probably, but it sure keeps us from forgetting simple things like the fueling catch pan.
Racing is a complicated game with many moving parts, and we usually have at least six people on our team for a race. Since we also tend to rotate people through our crew, these checklists are vital to keeping us on track.
Here’s an easy way to look at it: We used to treat racing like a fishing trip. We’d grab our tackle box, get in the boat, and hope we were prepared enough to catch a fish. Missing that lure? No problem. That’s when you crack open a beer and enjoy the scenery.
Now we look at racing like a rocket launch: Failure means exploding into a ball of fire in front of a crowd of people. Because, you know, that can actually happen.
Lesson 6: Testing Means Actually Testing

Photography Credit: Wayne Presley
We started our last installment with a simple takeaway: Test the car, and we’d be good to go for the next race. Yeah, it isn’t that simple.
We assumed that the car was tested after we’d taken it to a test day, and linguistically that sure seems to work. In reality we broke the car early on at both of those test days, and then left for Sebring assuming that we had found all the flaws.
Looking back, that’s like prepping for the SAT by leaving alter the first practice quiz. Test days don’t test cars, they test parts, and we realized that it was important to restructure our approach so that we’d actually be testing the parts that we needed to test. Case in point: Both of those abbreviated test sessions didn’t really stress our radiator. Once we got racing at Sebring, though, we learned that the radiator was partially clogged.
To fix that, we called Flyin’ Miata and ordered one of their crossflow radiators. This is not just another aftermarket aluminum radiator. Yes, it’s bigger and thicker, but rather than flowing coolant from the top to the bottom, this one routes the fluid across the radiator from left to right. Why? It allows the coolant to spend more time in the radiator, which leads to increased heat transfer.
Although we’ve never had a single problem with Flyin’ Miata parts not performing as promised, as Lesson 1 states, never assume anything. So we went to another test day at Talladega Gran Prix in Mumford, Alabama–a quite affordable track with plenty of room and plenty of runoff–to really push our Miata. After a full hour on track, our new used engine and cooling system were performing as expected. Finally, we’d actually tested what we needed to test.
Lesson 7: Put in the Time

Photography Credit: Wayne Presley
One thing was painfully obvious while we were reviewing our string of failures: We never seemed to have time to prepare the car correctly, which caused us to spend days on end replacing engines. Poor Richard had it right.
We’ll lay this one out very simply: In order to race, we needed to invest the time in preparation. No more “Ehh, we can do a work night later” or “I mean, I guess we aligned it well enough, it’s getting pretty late.”
No, in order to survive an entire race weekend without blowing up the car, we needed to invest the time early on. Case in point: After the test day, Wayne spent most of a day corner-weighting the car. Why? ChampCar’s rules prevented us from running threaded coil-overs, so we lowered the chassis and increased our spring rate by simply chopping the stock coils. Our old habits meant we might have been in a hurry when we chopped those springs: The rear rode too high in the air, and things weren’t exactly level side to side.
A taller rear ride height can tilt the car’s roll axis forward, creating greatly different load transfers at each end of the car. This can be used as a tuning tool, but in a naturally well-balanced car like a Miata, big deviations from the stock roll axis angle can lead to trouble. This meant less load transferred to the rear wheels than normal, which caused oversteer. And that oversteering was slowing us down.
The solution? Corner-weighting the car with a set of scales. And because we didn’t have the points budget to run adjustable spring perches–ChampCar uses a points system to regulate modifications–we’d need to adjust each corner by trimming each spring to length.
The process goes like this: Weigh the car, identify the corner that needs a lower ride height, remove that spring, cut it a little shorter, then reinstall and weigh the car again. And remember that it’s easier to shorten a spring than lengthen it.
After repeating this cycle a few times, our car was better than ever: a perfect 50.0-percent cross-weight and a race-appropriate ride height with the stiffer springs for a lower center of mass. This is an example of a huge time investment that made our car faster and easier to drive. And it saved us a bunch of time in the long run.

Photography Credit: Wayne Presley

Photography Credit: Wayne Presley
Lesson 8: Appearance Matters
Photography Credit: Wayne Presley
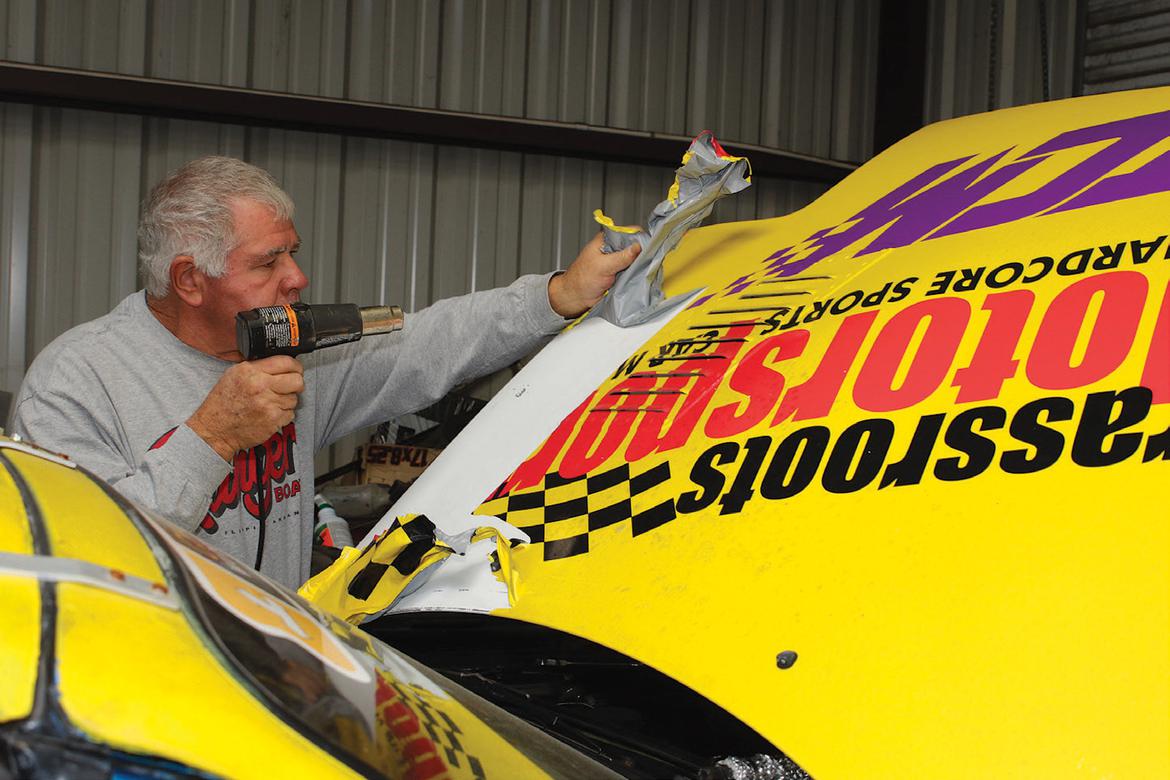
We picked up our current Miata to replace the Sunburst Yellow race car that got killed on track, and since we wanted to continue with the same team colors, we painted this car with yellow Eastwood ElastiWrap before we started racing it.
In the years since, our backyard paint job hasn’t aged particularly well. An on-track hit left the left-front fender bashed up, and we took a Sawzall to the hood at Daytona in a last-ditch effort to prevent another engine failure. Plus, the car was just plain filthy, and the finish had started peeling in a few places.
It was time to make the car look better. But why? After all, don’t budget endurance race cars just get bashed and scratched and dented anyway?
Yes, they do, but good-looking cars represent the magazine well. They also encourage respect.
Beyond photographing better, an attractive car demands more civility and courtesy, both from us and from the other teams. A straight, shiny car is less likely to get dive-bombed in a corner or pushed over the curbs. It’s also less likely to receive ham-fisted holes, half-baked wiring “fixes” and assorted kludges.
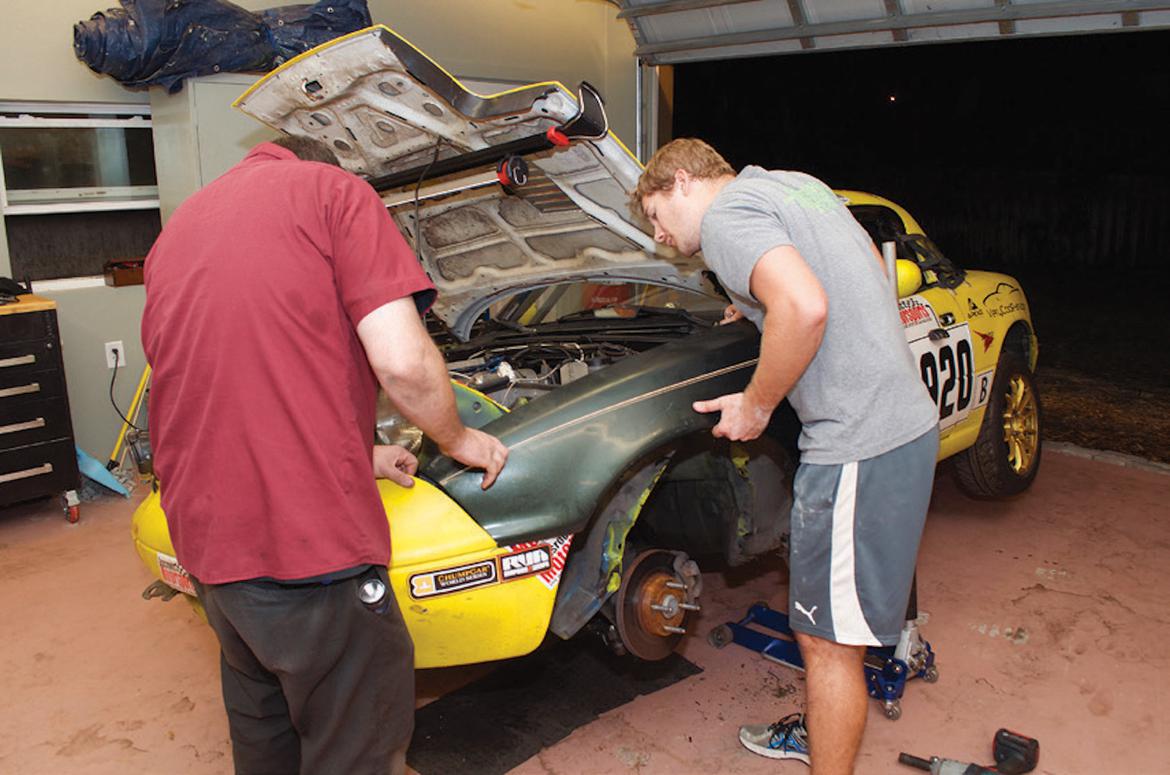
How did we fix our car’s appearance? We went with the cheapest, easiest option available: the original blue paint that came on the car. We’d already replaced the cut-up hood with a fresh one, but it still needed to be painted to match. We also grabbed a good, used fender from Treasure Coast Miata and sent both panels to a local paint shop. For a few hundred bucks, they painted the hood, roof and fender to match the rest of the car.
We then peeled away the remaining ElastiWrap. In spots where we’d sprayed it too thin to easily peel away, we dissolved it by liberally applying Goo Gone. Just like that, our Miata was shiny and straight once again.
Photography Credit: Tom Suddard
Lesson 9: Gauges Are Important
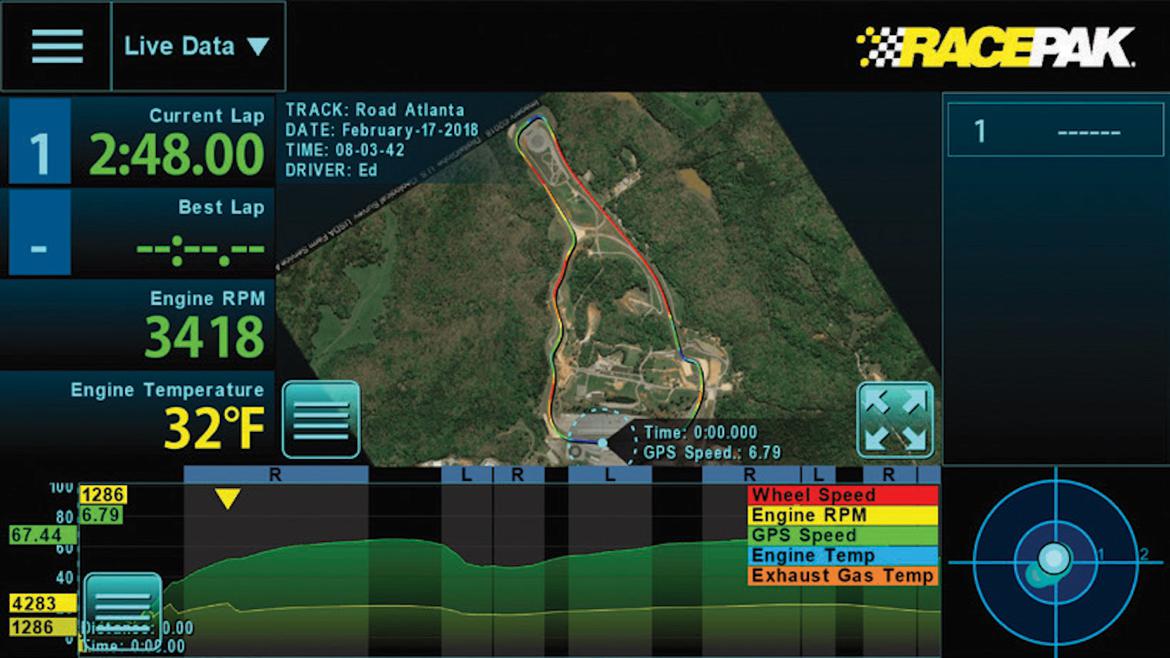
Yes, we know: You already realize it’s important to look at your car’s gauges. But we’re talking about more than the tach and temp gauge. Once our car was running, tested, sorted and pretty, we focused on ensuring that we’d never have another issue caused by a lack of communication between the engine room and the flight deck. So we added a Racepak Vantage CL1 data acquisition and telemetry system to the car.
This $600 box takes GPS location, accelerometer data and a few inputs of your choice, and pairs with a smartphone to display data to the driver and stream information back to the team in the pits. It’s sort of like a budget digital dash, but with telemetry built right in.
We paired the CL1 with a cheap Android smartphone (the kind that off-brand carriers give you for free), and suddenly we could keep very good tabs on our car. The CL1 can tell us the car’s location on track, the lap times being run, the status of the cooling system and so much more.
We also upped our communication game by installing a new harness from Nerdie Racing Communications. We’ve had good luck running bargain-basement Chinese radios, and Nerdie’s radio harnesses allow them to plug into the car just like professional-level systems. Our new harness takes that one step further by adding our GoPro camera. Now we can record radio communication on top of the camera’s mic. This allows us to review camera footage with full context–what’s going on at that moment and why. We figure it’s a great training aid.
And this doesn’t really count as a gauge, but while we had the doors open and the wire connectors out, we installed a new driver cooling system courtesy of Fresh Air Systems Technologies. Unlike some of the other chilled-water-in-a-T-shirt systems that we’ve tried, the F.A.S.T. system adds a neat trick: a potentiometer, which we mounted next to the shifter, that acts as a thermostat for the system. We faced weather between 50 and 70 degrees during the weekend, and it was awesome to be able to call up only a third of the system’s cooling capacity so we didn’t freeze to death.
Lesson 10: Luck is Preparation Meeting Opportunity

Photography Credit: Ed Higginbotham
We’d learned our lessons, rebuilt our car, and checked our checklists: It was time to give this racing thing another shot. So we signed up for another event, this time American Endurance Racing’s Road Atlanta event. We’d never run with the series before, but we’d heard that it featured stiffer competition than the other budget endurance series.
And, uh, wow: We’d heard correctly. Turns out we’d be sharing the track with everything from well-sorted Spec E30s to a Ferrari 458 Challenge. To be frank, we were terrified: Here we were, running with real cars and real racers, and we were just going to embarrass ourselves once again. We were sharing the track with teams that literally had factory support staff on hand for their factory-built race cars. And our biggest technical innovation at this point was cutting our springs more precisely the second time around.
Fortunately, AER’s format was a big confidence booster. At most weekend events, they use Friday for practice and qualifying, with the actual races held on Saturday and Sunday. That meant we had an entire day to sort out any remaining bugs and get comfortable in our car.
And thanks to our testing, we didn’t have many bugs to sort after a day of practice. Our only issue during practice? The radiator fan wouldn’t turn on, leading to fairly high coolant temperatures at some points around the track. A quick run to the parts store for a new universal fan fixed that issue, and we were back in action. We swapped on a brand-new set of Bridgestone Potenza RE-71R tires before putting the car in the trailer for the evening.
Then it was time to race. Saturday morning’s race start went well, but just a few laps after the green flag, our Miata came back into the pits. We’d broken a front anti-roll bar end link, causing a bad clunk and effectively disconnecting the front bar from the car.
Thanks to our newfound organization, we quickly fixed things. We flipped the link upside-down so it couldn’t separate from its bushing. The result? A fun, easy day at the track.
We finished Saturday toward the back of mid-pack. It wasn’t a victory by any stretch of the imagination, but it was certainly a personal triumph: We’d finally rehabilitated our turbo Miata, and it had completed a full day at Road Atlanta without any major issues.
Then came Sunday. AER treats each day’s race as a separate event, so we were back in the running for a solid finish, provided the car would cooperate. We drove through the morning without issue, though we watched in horror as each pit stop knocked us down another position or two.
AER requires only five stops per race day, but our Miata struggled to run for more than an hour before fuel starvation set in. That meant we were pitting far more often than the other cars in Class 1, AER’s slowest class. We finished a trackside PB&J lunch with our car running in mid-pack. We were consistently running laps around 1:49, which we thought was pretty darn good for a Miata on mostly stock suspension with 200-treadwear street tires.
Then Mike Skeen walked past our pit stall. This professional driver has a resumé that exceeds his humble persona, with podiums in NASCAR, IMSA, FIA World Endurance Championship, Pirelli World Challenge, Pikes Peak and even the SCORE Baja 1000. Mike’s like 6-foot-3, so we asked him a simple question: “Do you fit into a Miata?”
As it turns out, he does–mostly thanks to the Advanced Autosports drop floor kit in our Miata, which lowers the driver’s seat an additional 1.25 inches. Mike went out on track and almost immediately posted a 1:45.6-second lap. Wow! We watched our car climb a few positions, passing cars we’d only dreamed of catching before. Then he needed gas just 45 minutes into the stint. We refueled the car, and he ran another hour, clicking off laps nearly 4 seconds faster than we could manage.
All good things eventually fade away, and Mike was no exception. After nearly 2hours in the car, he had people to see and cars to drive, so he left with a smile and a wave.
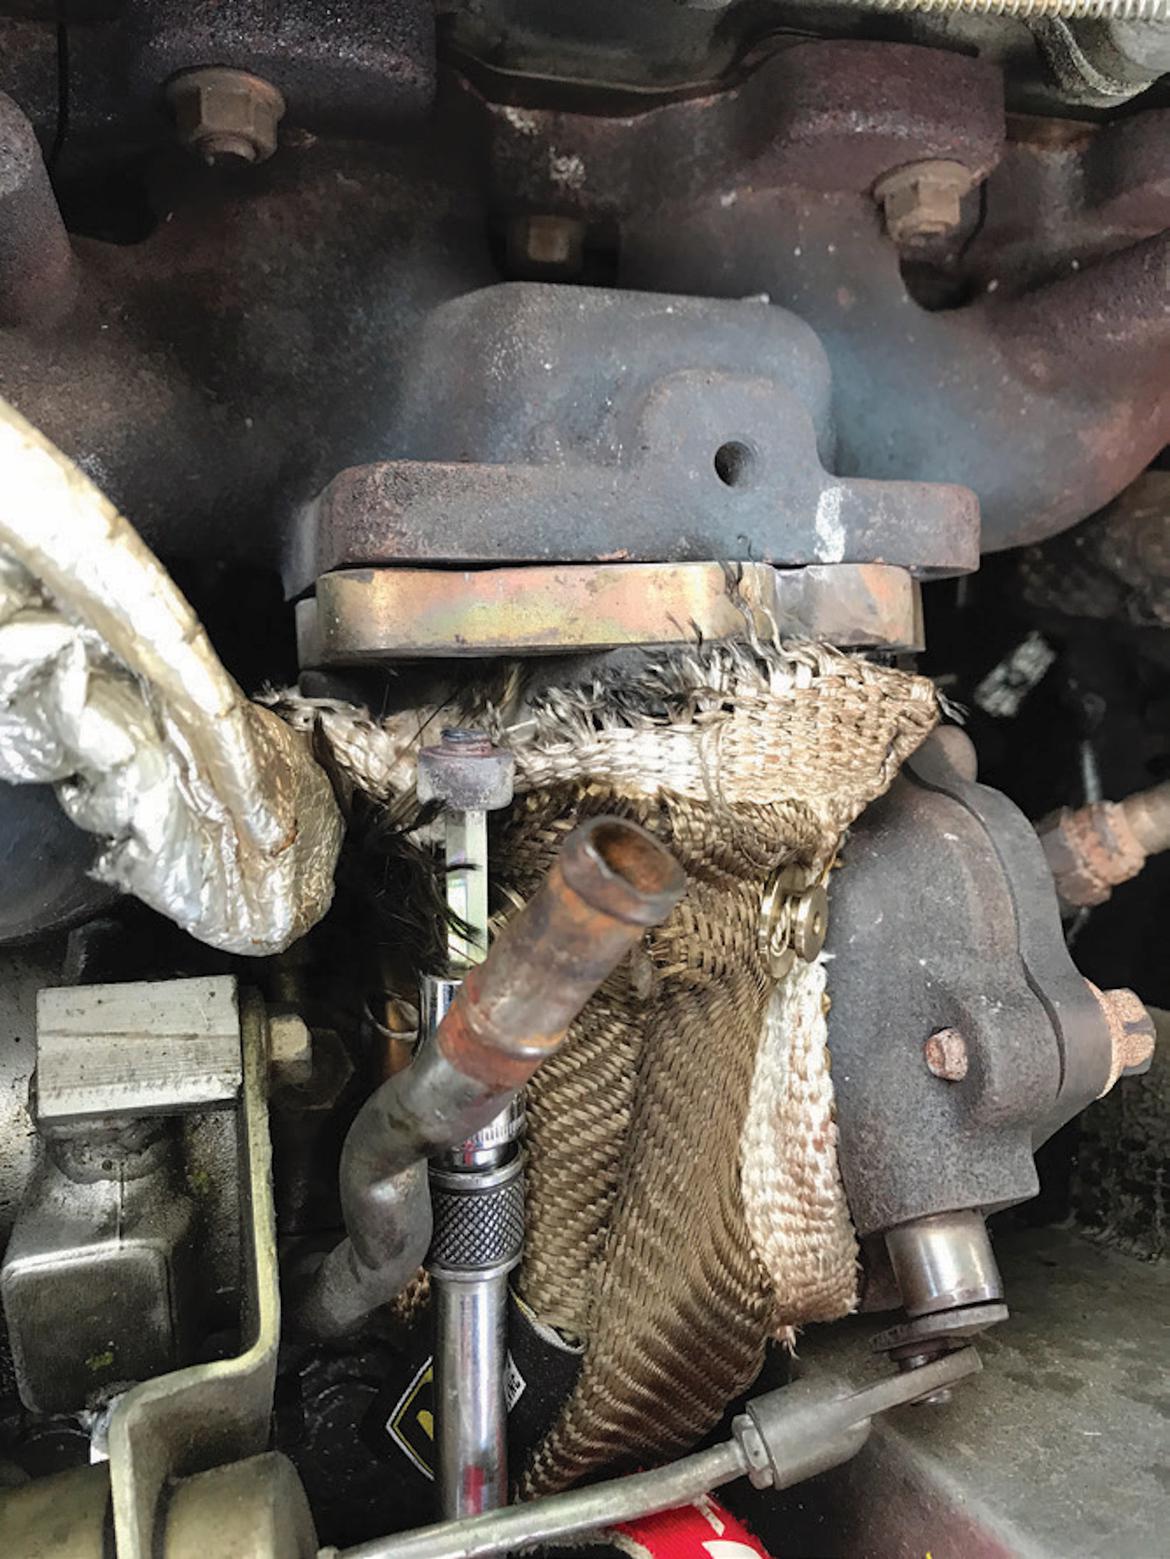
We soldiered on for the last few hours, although the car was noticeably down on power by this point. Twenty minutes before the end of Sunday’s race, we pulled it into the pits: The turbo wasn’t making boost anymore, and the left-side tires had clearly had enough of Road Atlanta’s turns. We finished the weekend in fifth place out of 12 entrants in our class, and a quick post-race inspection confirmed our fears: Our turbo broke two of its mounting studs while stretching the rest. We were basically pumping more exhaust through the gap than the turbine.
What’s next for our Miata? The car has a few glaring needs before it gets any faster–mostly stiffer springs, which explains the aggressive tire wear–but there’s a method to our madness. We ran the car at AER Road Atlanta in full 500 point-legal ChampCar trim, because we’d be returning to Daytona International Speedway with the ChampCar Endurance Series on April 7. We blew up the car just a few laps into last year’s ChampCar Daytona race, so this will be our chance to right our wrongs and set the record straight.

Photography Credit: Ed Higginbotham

Photography Credit: Ed Higginbotham

Photography Credit: Ed Higginbotham

Photography Credit: Ed Higginbotham

Photography Credit: Ed Higginbotham

Photography Credit: Ed Higginbotham

Photography Credit: Ed Higginbotham
Photography Credit: Ed Higginbotham

Photography Credit: Ed Higginbotham

Photography Credit: Ed Higginbotham

Photography Credit: Ed Higginbotham


