Our series on helping every fabricator build better parts started with the basics: How to draw those parts, design them with a computer, and instruct a sub-$200 3D printer to bring them to life from plastic. Now it’s time to start cutting metal.
The Home Shop Order of Operations
What should a frustrated CAD modeler buy after they’re bored with the 3D printer? The answer is ideally “a machine shop,” but remember: We’re doing all this in a home garage on a normal person’s salary, which means $100,000 CNC mills are off the table.
We bought a Bridgeport knee mill and a reasonably sized lathe, which we’ll cover in future installments of this series, because we think the best next step is another machine: the CNC router. For just $200, this magical device can make parts for your race car out of real materials, like aluminum and carbon fiber.
What’s CNC?
Let’s start with the first part of this new tool’s name: CNC. Most people think of CNC as a device you can buy, but it’s actually just an adjective that can be put in front of any tool.
That giant milling machine you’re picturing? That’s a CNC mill. There are also CNC lathes, CNC plasma cutters, CNC sheet metal brakes, CNC tubing benders and much, much more. If a tool exits, odds are there’s a factory somewhere using a CNC version of it.
CNC stands for computer numerical control, and it basically means that a computer–rather than a human–spins the knobs. The computer reads instructions to know how far to move each axis and acts as the machine’s operator.
Why the clunky name? Blame history. Before CNC, there was NC. Numerical control meant machines read instructions from paper tape or similar storage mediums. Once computers came along, CNC became the default technology for most production machining work in the world.
What’s the benefit?
“I don’t care if I have to turn the knobs manually,” you’re probably thinking. “I just want to build one part for my race car. Who cares if it takes some extra time?” We hear you, but not so fast. CNC machines aren’t just significantly faster than humans, they’re capable of superhuman feats, too: compound movements.
Think of a mill like your childhood Etch A Sketch, with one knob that controls the x-axis and one that controls the y-axis. Remember trying to draw angled lines? What about a circle? Think you could draw a self-portrait?
Before you head down the CNC rabbit hole, know two basics: x-axis and y-axis. Remember your Etch A Sketch? Same concept but much more refined.
Humans just can’t generate these complex shapes in real time, and they certainly can’t do it with the accuracy required for car parts. Computers, though, don’t care. Tell them they can only use an x and y knob to draw a perfect circle, and they’ll knock it out of the park every time. That’s why CNC machines are more than just faster versions of their human-operated counterparts.
Hey! Close that complaint email! We know that complex shapes are possible from human hands, too. We’re very happy you’ve mastered your rotary table and your 27-gear linkage tying your power feed to your second axis. For the average home builder, though, those techniques are effectively impossible when making a variety of different parts.
What’s a Router?
We’ve covered CNC, so let’s tackle the second part of this new tool’s name: router. This one is probably more familiar, and it’s dead simple: an electric motor with a cutting bit on the end that removes material. The motor, bit and material can vary widely, but you get the basics.
Put these terms together, and the basic structure of a CNC router makes sense. It’s a router with a bit that’s automatically moved around a table by some sort of CNC-driven support structure. And if you’re thinking this sounds like a CNC mill, you’re right.
We couldn’t find a clear set of rules that categorizes machines as one or the other. Generally, though, routers have less accuracy, less rigidity and a much larger work envelope. Mills can take heavier cuts on tougher materials with more accuracy, but they sacrifice work envelope.
Here’s a simple way to tell them apart: If it looks like it’s made to cut things out of flat sheets, it’s probably a router. If it looks like it’s made to cut blocks of metal, it’s probably a mill. Routers can be accurate to about five-thousandths of an inch, while mills can be accurate to within a few tenths of a thousandth of an inch.
The most common size of CNC router seems to be a roughly 4×8-foot work envelope, because most raw materials come in sheets that size. We’ll be talking about something slightly different for our own shop, the desktop CNC router, which is the most accessible CNC machine on the planet. The most common work envelope is about the size of a standard notebook.
Meet the Mercury Capri of Routers
When we purchased our Creality 3D printer, we called it “the Miata of 3D printers” thanks to its decent performance out of the box and a strong aftermarket. In the context of cutting aluminum, what we’re about to talk about is not a Miata. In fact, it’s closer to a lesser copy that can barely, maybe, sort of do the job in question if treated gently.
So we’ll introduce our new tool this way: Meet the Mercury Capri of routers. No, not the cool first-generation Capri. Not even the groovy second generation. We’re talking about the anemic, awkward-looking, front-wheel-drive third generation that was mercifully killed after just four model years. This is the generic, imported 3018 CNC router, the underpowered hub of our parts factory.
Sold under various brand names and with various accessories and improvements, this router is called a 3018 due to its work envelope, 300x180mm (about an 11×7-inch rectangle).


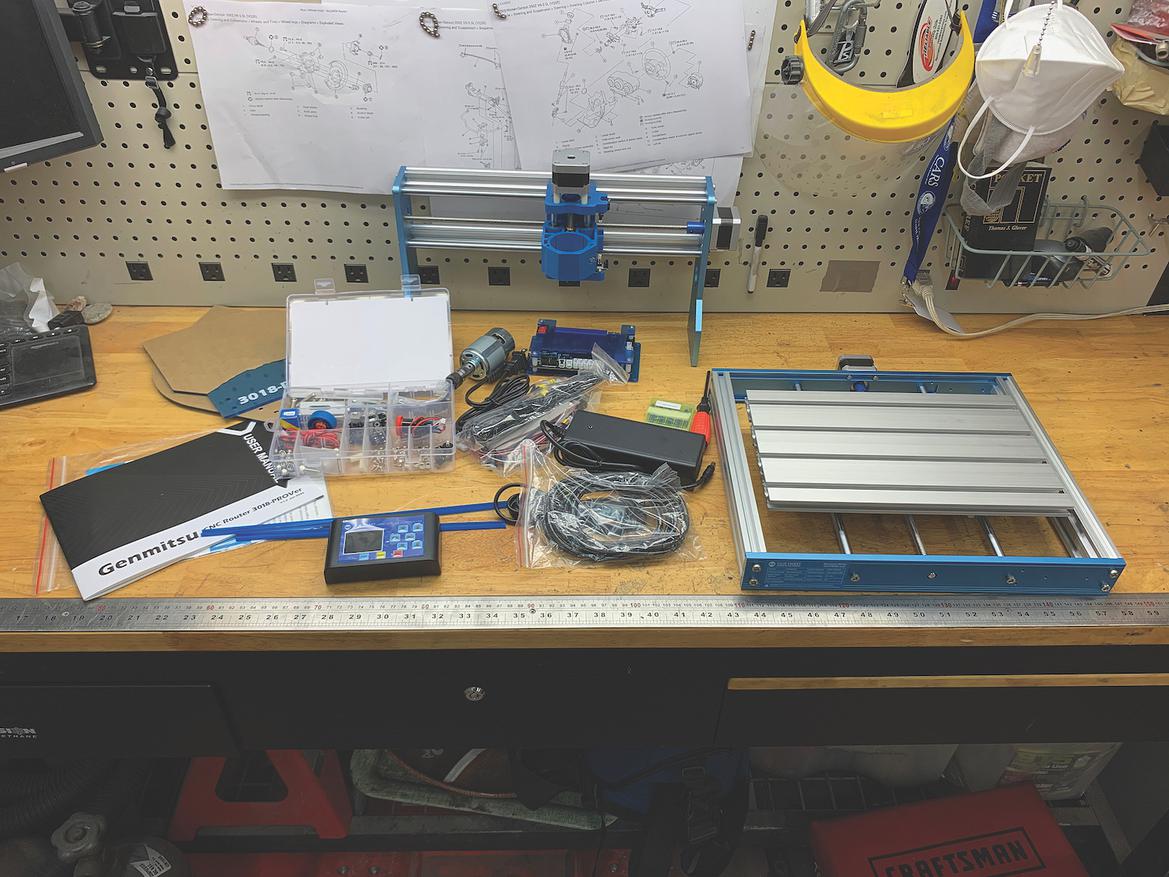
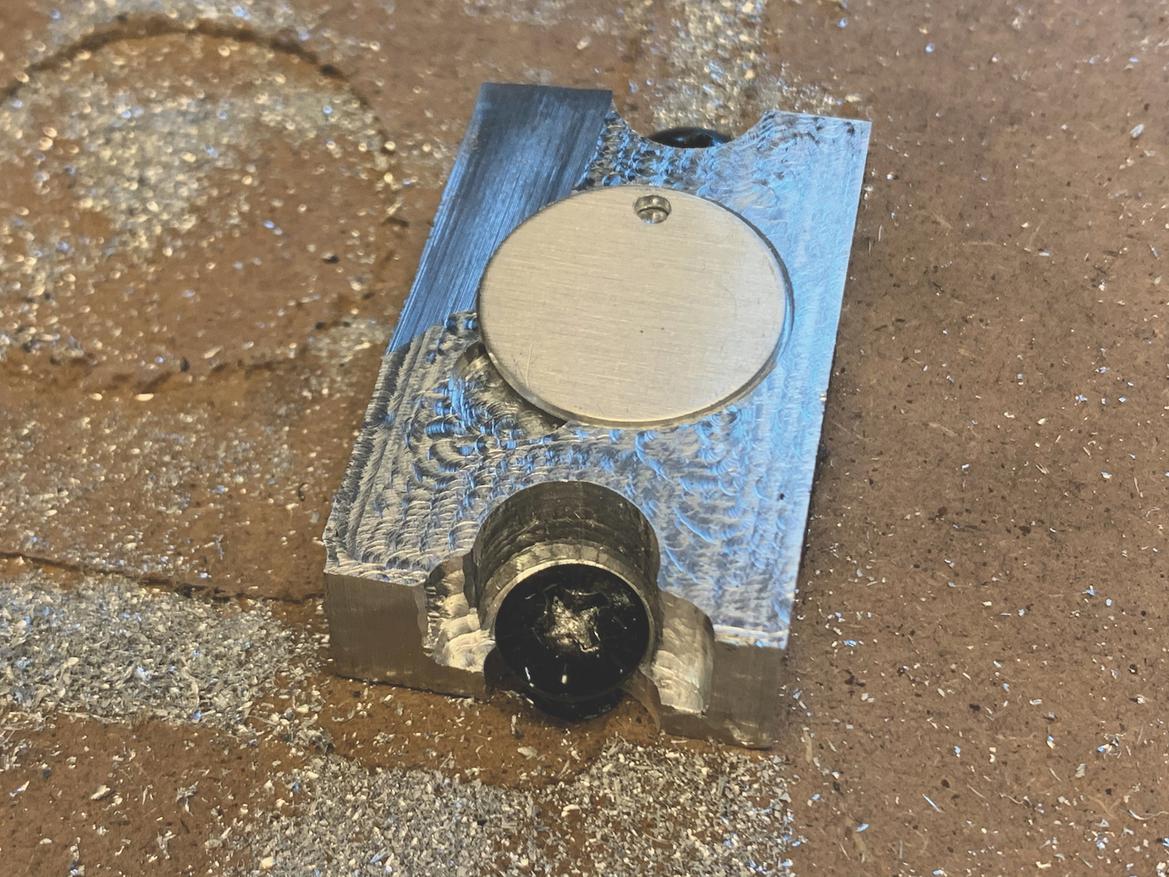
Our home CNC journey started with a 3018-PROVer. After assembling it, we could attack a simple project: engraving keychain fobs using our custom holder.
It costs as little as $200, and you’ll find scores of them on Amazon and eBay. It has about the same power as a Dremel, key parts are made of injection-molded plastic, and it’s not even technically a router. Most sellers call it an “engraver” because you’d have to be insane to try taking deep cuts with it. But here’s how we did it anyway.
For the princely sum of $314, we ordered the top-of-the-line 3018, a 3018-PROVer. That extra $100 or so got us an offline controller, limit switches, an emergency stop and a tool touch probe. These are extremely beneficial for your first machine, so we recommend splurging on similar upgrades. It’s worth noting that none of these make the machine more powerful, though, and you can get these same results with the cheapest version.
After an evening of tinkering, we’d assembled the 3018 and installed the supplied software on an old laptop. It was time to start building.
Fire Up the CAMputer
But having a machine doesn’t make you a machinist, and we had a lot to learn. Before we could cut anything on our new CNC router, we needed a program to load into it.
Just like our 3D printer, our new CNC router runs on G-code, which is a set of instructions that tells the machine where to move and how fast to move there. G-code’s format allows for customization, too, and ours would tell the 3018 how fast to spin its spindle as well.
Basically, we don’t tell our machine, “We need a 350Z door handle bracket.” Instead, we tell it, “Move in these directions at this speed.” That program, if written correctly, will result in a 350Z door handle bracket.
[Project Car: LS-Swapped Nissan 350Z]
The 3018 can’t even read G-code directly. Instead, that old laptop we connected reads the code and requests the correct movements. Or, since we have the fancy 3018, an included dongle can run G-code off an SD card without a laptop present.
So where does G-code come from? Welcome to the next three-letter acronym: CAM, which stands for computer-aided manufacturing. CAM software helps you turn your CAD model into manufacturing instructions, and Fusion 360, our preferred CAD package, includes a CAM module for free.
We won’t get into the minutiae of CAM, as each software package treats it differently, but here’s the basic workflow: First, design the part. Then, fire up your CAM software and tell it the basics–your machine’s capabilities, what tool(s) you’ll be using, and what size and material of stock you’ll be making your part with.
Once you’ve set up the basics, you can build individual tool paths to gradually chip away at stock until only your part is left. Two key parts of this process are feeds and speeds, meaning how deep of a cut the machine takes with each pass and how quickly it moves. Our 3018 is one of the least powerful, least rigid CNC machines on the market, so we needed to use extremely light feeds and extremely slow speeds.
Once you’re satisfied, export your program to G-code, load it into the machine, and watch your part come to life.
Let’s Make a Part
For our first test, we ordered a bunch of cheap aluminum keychains and designed a few simple test programs. Our goal? See if our 3018 worked, damaging 50-cent stock instead of $50 stock in the process.
After some trial and error–and more than one broken engraving bit–we were able to make our own custom aluminum keychains. Success!
Emboldened, we decided to get fancy. Could the 3018 create complex three-dimensional parts out of aluminum? We fitted a 4mm router bit, clamped down a tiny block of 6061 aluminum, and had our answer a few hours later. The 3018 carved a custom-made keychain fixture, our overengineered solution to holding down each keychain for engraving. We were officially CNC machining aluminum parts.
After a few more tests and a $20 upgraded spindle, we stepped up to the big leagues and successfully made a door handle bracket for our 350Z on our little 3018 CNC. That settled it: It was possible to make aluminum parts on this machine. It was at the far upper limit of a 3018’s capability, but it was possible.
More Commoditized Machinery: the 6040 CNC
But if we wanted to cut aluminum well, we’d need to stiffen the 3018, beef up the stepper motors, and add more power to the spindle. Oh, and we could really, really use a larger work area, too.
This was far too much work to waste on that little machine–akin to trying to make a Mercury Capri out-handle a Miata. So we cut bait. After all, we’d bought a generic piece of imported machinery once and gotten away with it. Why not repeat that feat?
The 3018’s bigger sibling is commonly referred to as a 6040, and it seemed to offer everything we wanted. It was a much stiffer machine with a much more powerful spindle and a much larger work area.


We then graduated to a 6040 machine: more power plus the ability to tackle bigger CNC projects.
We got one on eBay for just over $1000, then spent weeks trying to get it to work. We do now have a working 6040 that cuts aluminum like a champ, but it was far from plug and play. Check out our 6040 CNC forum topic at grassrootsmotorsports.com/6040 for the blow by blow.
We’d learned how to use CAD software, printed parts from plastic with a 3D printer, and now made them from aluminum with a CNC router. But let’s say you want to make stronger parts–maybe built from materials like steel or stainless steel. Or perhaps you’re looking for tolerances tighter than five-thousandths of an inch. We’ll make that leap in the next installment, when we buy our first “real” piece of machinery.


