

Anyone who’s ever had a track car has probably done some aluminum fabrication. Whether that was a simple hand-formed bracket or a more complex structure, aluminum’s low cost, ease of availability in big-box stores, high strength-to-weight ratio and mostly benign nature make it the perfect material for even the novice fabricator.
Self-Tapping Screws
Let’s face it, if it weren’t for self-tapping screws, there’d probably be no amateur motorsports hobby. Self-tappers are the zip ties and duct tape of the hardware world, and their low-tech effectiveness has gotten us out of many a jam.
But their simplicity can also be their weakness. The threads of self-tapping screws leverage themselves against the work material with a fairly coarse pitch, so in thinner materials each thread doesn’t get much purchase. For attaching thin materials to thicker materials, they work better.
We’ll also put regular sheet-metal screws with a separately drilled pilot hole under this heading, but really, who has time to grab two different drills when your screw can just make a hole all by itself?
Pros: Simple, one-operation fastener. Cheap and plentiful. Strong shear resistance. Can be used to attach disparate materials. Can be used as a “blind” fastener (where you have no access to the back of the fastener). Easily removable.
Cons: Strength is highly dependent on material thickness, and it’s not huge in the best of circumstances. For maximum joint strength, thickest material must be away from screw head. Not rotation resistant, and rotation can cause loosening. Creates sharp, pokey thing on opposite side of joint. Removal is possible, but each application weakens the hole a bit. Hole needs to be the right size.
Best for: Emergency repairs, non-mission-critical or low-strength-requirement fabrications, temporary fastening during assembly, when you’ve just given up.
Aluminum Rivets
Rivets are the classy person’s self-tapper, and far more appropriate–and better-looking–for permanent constructions. When used with a backing washer, the rivet places the load of the joint on the face of the material, rather than relying on the bending force of the material to hold the threads as with a sheet-metal screw.
And those backing washers are pretty important. Rivets can be used as “blind” fasteners for attaching workpieces that can only be accessed on one side, but their very nature as ductile, deformable objects makes them inherently susceptible to eventual loosening under load.
And while rivets are generally fast and easy to use, employing best practices is especially important to get the strongest joint possible. Choosing the proper rivet length for the connection is vital. Rule of thumb: Rivet length should be equal to the total hole depth (including backup washer if employed), plus 1.5 times the rivet diameter. Not that we’d ever recommend using the wrong hardware for a project, but if you’re ever in a jam, slightly too long is better than slightly too short.
Also, when fastening materials of differing hardness, the strongest joint will be achieved when the head (tool end) of the rivet is placed on the softer of the two materials.
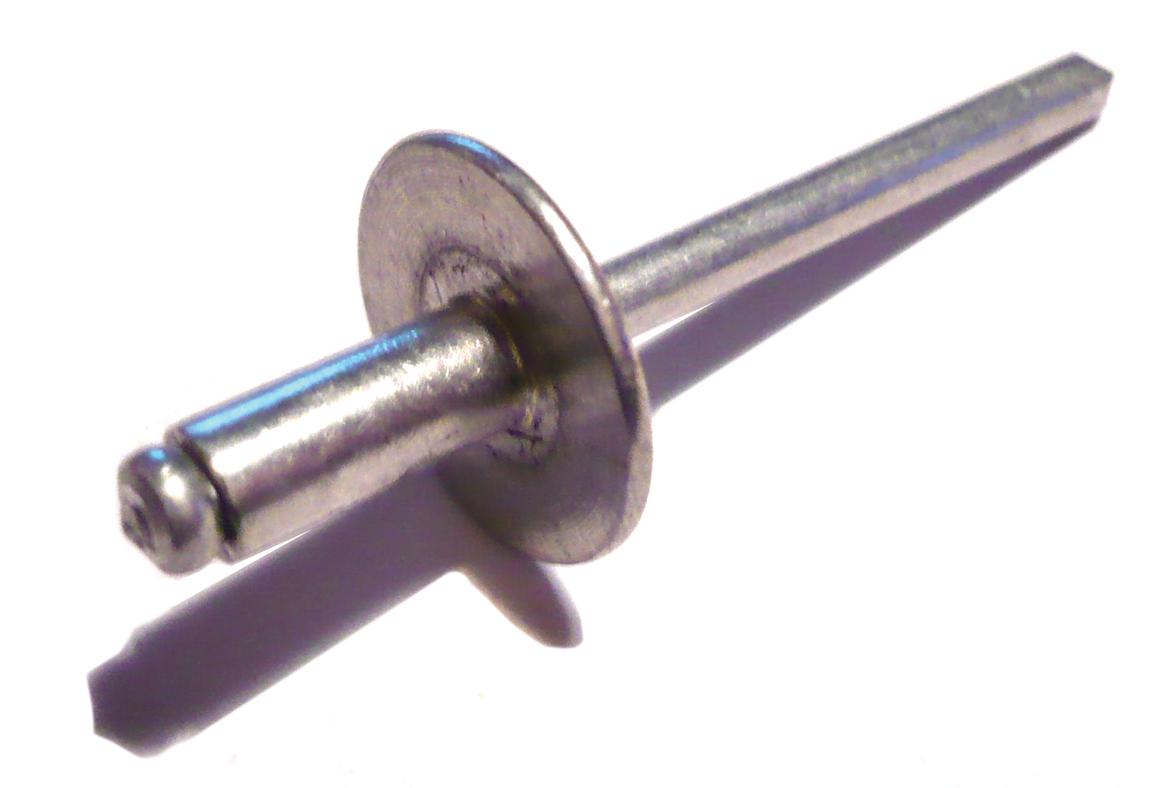
Pros: Excellent strength, finished appearance, can be installed blind, readily available. Expands to fit the hole.
Cons: Requires multiple operations (drill, align, rivet). Highly variable joint strength depending on application (material thickness, washer use, etc.). Allows rotation. Can compress and distort soft materials. More complex removal, but removal generally doesn’t affect the workpiece.
Best for: Lightweight fabrications that don’t need to be disassembled to be serviced. Joints that will experience lot of vibration. (Threaded fasteners tend to loosen under vibrational stresses; rivets are more vibration resistant but don’t deal with shock loads as well as threaded fasteners.)
Bolted Connections
A bolted joint with a threaded fastener and a nut is the ultimate non-welded connection for aluminum–or any other machinable material. Generally, a properly applied bolted connection is as strong or stronger than the material around it when used in sheet or thin plate applications. Properly sized and constructed bolts have excellent tension and shear resistance and are easily removable without lasting effect to the workpiece.
But bolted joints have their downsides. First, the joint must be physically configured so a bolted joint is possible. Typically, this means two flat, parallel surfaces on either side of the joint with good contact between them. For butt joints or anything lacking flat mating surfaces, bolts usually aren’t the answer.
Plus, all threaded fasteners are susceptible to vibrational loosening. This can be combatted with chemical-thread lockers and vibration-resistant washers like Nord-Locks, but it’s still a consideration in high-vibration environments.
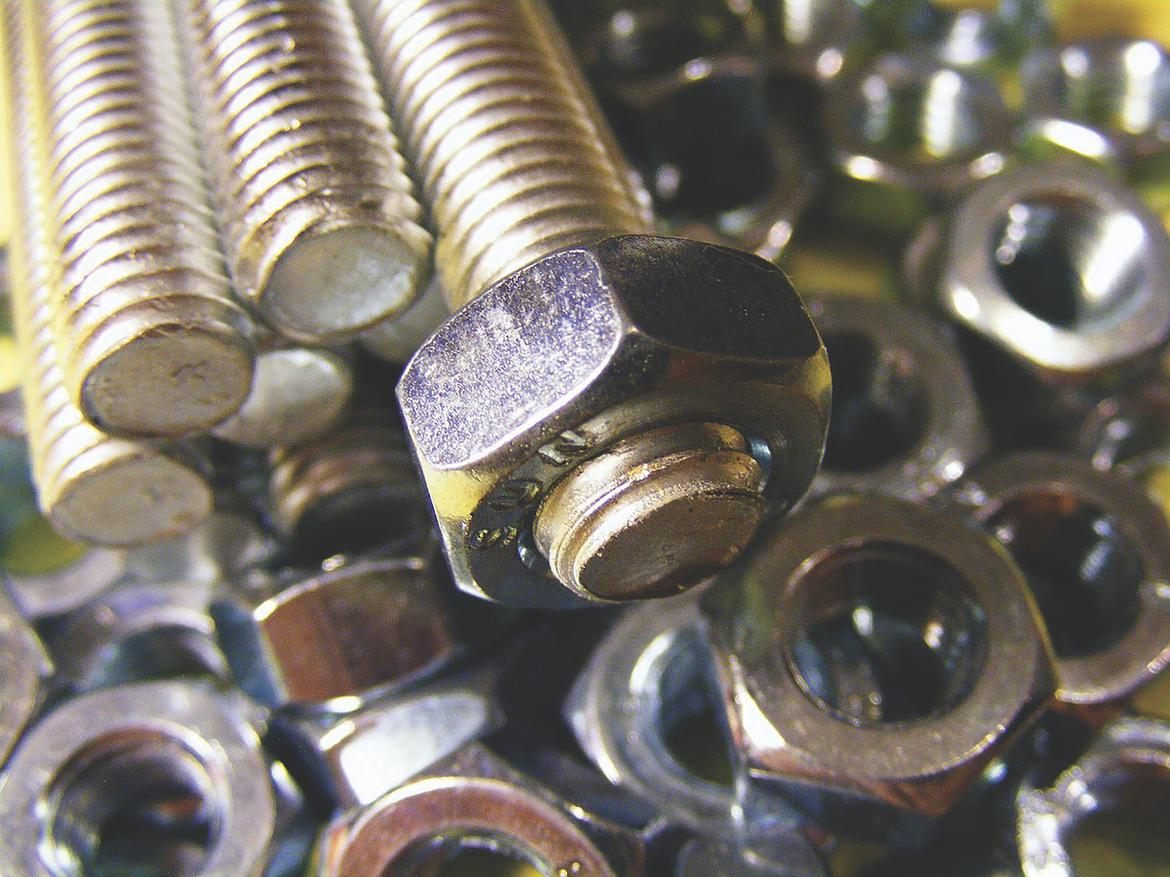
Pros: Strong, simple, readily available hardware. Highly calculable strength. Removable. Joint tension can be controlled with high accuracy.
Cons: Requires access to both sides of joint. Lots of weight compared to screws or rivets. Susceptible to vibration, especially if hole hasn’t been reamed to correct size.
Best for: Make bolts and nuts your first choice for any mechanical fastener, then assess whether they’re really what you need or can use in each situation.
Brazing and Soldering
Brazing and soldering are similar processes. Both join metals via media that melts and adheres to adjacent surfaces before solidifying–all without melting the base metals. The distinction is mostly one of temperature.
Soldering is essentially a low-temperature form of brazing. It typically uses a filler material that melts below 450 degrees, while brazing uses a material that melts above that temperature. In the case of aluminum, most brazing material melts around 800-900 degrees, which is still a few hundred degrees short of aluminum’s melting point.
Right off you can see the advantages of brazing: It’s a non-destructive process that keeps intact the bits that it joins. Think of it as metallic hot glue, and you’re on the right track.
Brazing also allows dissimilar metals to be joined. Need to stick copper to aluminum? Aluminum to steel? Steel to tungsten? All are possible with brazing, and chances are you have a piece of cookware, a bicycle or a firearm that employs one or more such connections.
Experts will swear up and down that a properly brazed joint is just as strong as the base metals it’s joining, but the word “properly” is doing a lot of heavy lifting in that sentence. Proper brazing–especially with aluminum–is an incredibly finicky process that requires surgical cleanliness, zero-tolerance fitting, and saintly patience to achieve those strong-as-the-base-metal joints. Not infrequently you’ll end up with a blob of brazing rod that just falls off the joint, cursing at the late-night TV ad for making it look so easy.
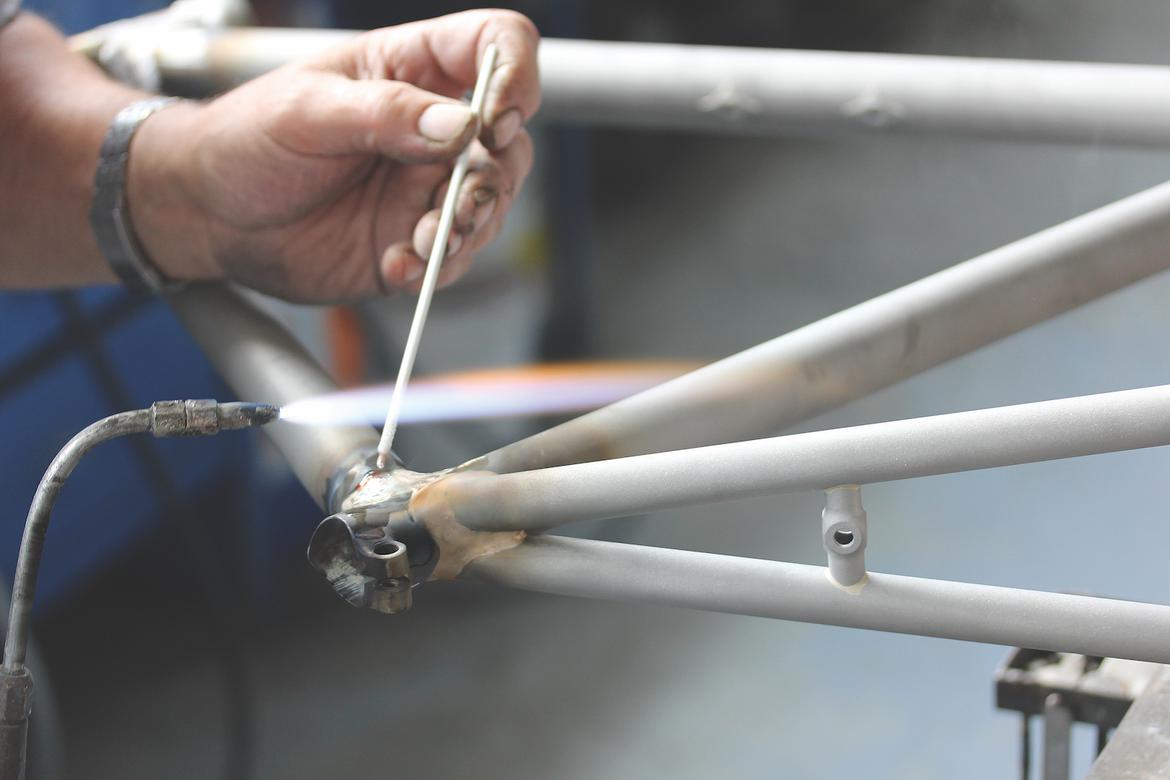
Photography Credit: Cyfac
Pros: Able to join dissimilar metals. Requires no tools more specialized than a torch. Inexpensive materials. Strong joints if you do it right.
Cons: Strong joints only if you do it right–much harder than it looks on TV. Requires meticulous surface prep and precision to form best joints.
Best for: Non-safety-related fabrications with lots of overlap on the joints, tubing connections, panel bonding, thin materials where welding could be too destructive to the workpiece.
MIG Welding
One of the trickier aspects of welding aluminum is its thermal properties. Unlike steel, which covers a broad temperature range as it goes from red hot to soft to liquid to super-runny liquid melting through your shoe, aluminum does all of that within a much more compressed temperature window. Aluminum also absorbs and subsequently sheds heat much faster than steel, meaning the physical properties of the piece you’re working with actually change during the welding process.
Nowhere is this more noticeable than during MIG welding. As with steel, MIG welding aluminum employs a filler wire that’s fed into the joint while also grounding a lot of electricity, creating a very hot arc that produces a molten puddle in the workpiece. This molten puddle is moved along the joint while being fed by the filler wire to form a welded joint that’s strong yet, thanks to the fast rate of cooling, also brittle–so not best for situations that see a lot of vibrations.
Unlike with steel, aluminum MIG welding requires pure argon rather than an argon/CO2 blend, and the softer aluminum wire is usually fed to the welding torch via a spool gun, so the wire doesn’t have to push as far. But aside from that, the basics of steel and aluminum MIG welding are similar.
Except they aren’t. As we mentioned before, aluminum’s thermal profile can make MIG welding frustrating at times. Because it melts so much faster and more aggressively than steel, your weld beads typically need to move much faster than with steel. So fast, in some cases, that you really can’t see into the molten puddle very well. So, you need to line up your weld, strike your arc, and move through it with great precision–mostly on muscle memory, since you can’t really eyeball your way through it like you can with slower-melting steel.
Then there’s the fact that aluminum absorbs heat very rapidly during the process, meaning your weld pass not only has to be quick, it has to accelerate. Otherwise, the end of the weld will be far too hot compared to the beginning.
MIG welding can be frustrating, but once you get the hang of it, it’s fun and rewarding. And best of all, it can be done with low-cost MIG machines. Eastwood’s MIG 175 can be ordered with a spool gun for around $500. Switch wires and gas, and you’re welding steel in a few minutes.
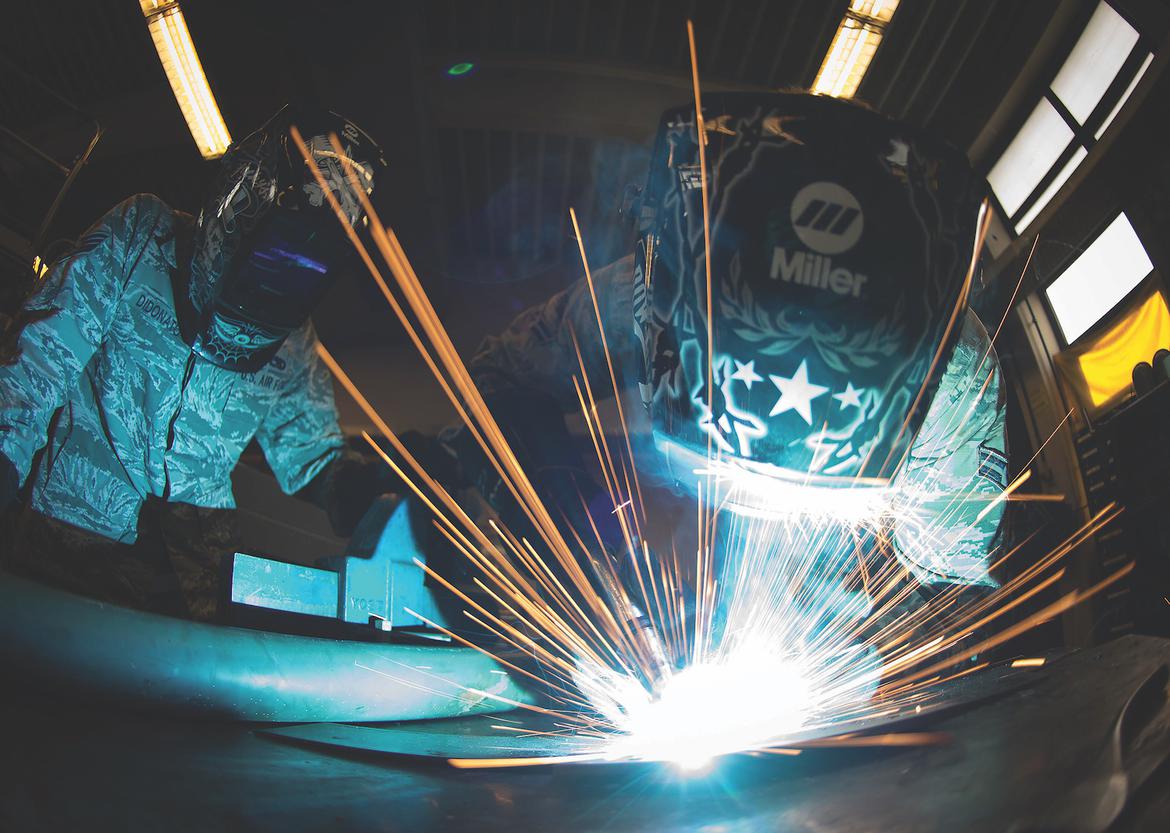
Photograph Courtesy USAF/Elizabeth Baker
Pros: Low cost relative to other welding methods. Very learnable if you know how to MIG steel. Fast. A true molecular connection.
Cons: Welding aluminum of dissimilar thicknesses can be capital-T tricky. Not the prettiest welds in the world, even for skilled operators. Generally unforgiving relative to steel MIG welding. Brittle joint.
Best for: Beginner aluminum welders who can adapt their steel-welding skills to the new material.
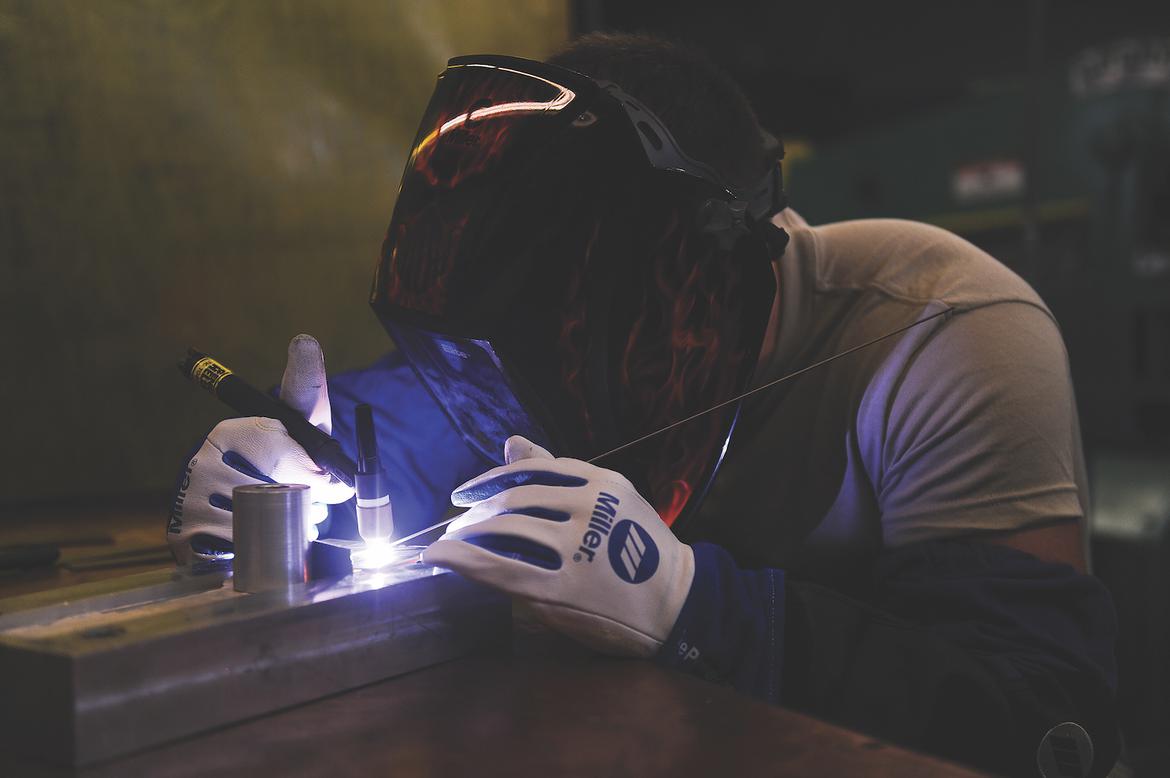
TIG Welding
When we think of welded aluminum joints, most of the time we picture TIG welds. That stack of perfectly aligned dimes (or coins of various denominations, depending on your skill level) at the intersection of two pieces of metal is an iconic image, and for good reason: Proper TIG joints are strong and durable, and even crappy TIG joints are pretty darn good. A bumbling novice with a TIG can probably make a stronger joint than a bumbling novice with a MIG, although we don’t recommend entrusting those joints with anyone’s safety.
Like MIG welding, TIG welding melts the area at the joint and then allows it to reform after flowing a melting filler into it. But unlike MIG, TIG gives you far more control over the amount and application point of the heat going into the joint. With TIG, you strike an arc from the tungsten-tipped torch to the workpieces, then control the amperage–and therefore the heat–of that arc in real time during the welding process. So, joining materials of differing thicknesses becomes much easier, as does working with thin materials that would just be obliterated by a MIG welder.
If it sounds like a complex process, that’s because it is. TIG welding requires the operator to maintain the arc with the torch in one hand, apply filler rod with the other, and control the power with a foot pedal. There’s a lot going on, but the upside is that you get to control the pace fairly precisely.
Photograph Courtesy: USAF/Aaon Jenne
Pros: Despite its complexity, TIG is fairly novice-friendly, mostly because it works in an intuitive way and is very slow-paced. Makes strong, malleable, good-looking joints. Able to join materials of dissimilar thicknesses.
Cons: More expensive than MIG, although prices are coming down and good TIG machines can be had for less than $1000. Requires a lot of consumables. Slow, painstaking process. No matter how good you think you are, there are hundreds of people on Instagram way better than you.
Best for: Projects requiring a high degree of precision. People with patience.


